I recently started a new project that transferred me to work in another office. It adds 30 minutes to my commute every day and they're a little stricter about being timely and hitting the ground running. AKA for me, no shredded wheat and yogurt at my desk at 9:30 am - I need to eat before I get there. (Getting up EXTRA early? Super bummer.)
As you may have figured out by now, I'm a big fan of poached eggs. Eggs make perfect breakfast foods because they are single small servings that are packed with protien that will keep you running through the day. I made a serving of bacon kale last night for this morning and splurged on buying turkish pide bread I found at my supermarket. But I wanted to have my egg and eat it too!
The microwave-engineers-that-be are one step ahead of me! http://www.whatscookingamerica.net/eggs/microwaveeggs.htm
Microwave poached egg
Grab a mug and fill with half a cup water. Mugs are perfect because they're deep and will make your egg the perfect circle!
Grab a fresh egg. Crack the egg and gently ease it in the mug. The egg will fall to the bottom. If the yolk is still whole, poke it with a fork. (The yolk can explode).
Cover the mug with plastic wrap.
Cook the egg on full power for 1.5 to 2 minutes.
If you're doing this for the first time, better to overcook when in doubt. If the egg doesn't looked completely done, let it sit in the water for another half minute and make sure the egg white is solid. (Mine took 2.25 min but I was also running the toaster for my pide!)
Pour out excess water slowly over a slotted spoon. Serve with a pinch of salt and pepper
Friday, April 30, 2010


Sunday, April 25, 2010
Brunching in Style: Poached Egg over Collard Greens with Bacon
Weekend mornings are special times. You wake up late and want something rich and decadent, not too much, but enough to last you until dinner. This is how brunch was made, my friends.
Today's brunch is rich and full of color. Its sure to impress if you had a midnight guest and will be filling enough to last you through the afternoon.
The collard greens can be replaced with spinach or green beans or practically anything. But the richness of the egg yolk and bacon complement the slight bitterness in leafy greens. The bacon renders a lot of fat so you should not need any oil (unless you replaced it with turkey bacon or ham).
Serve with toast triangles, a mimosa, and follow with coffee and a piece of chocolate.

Poached Egg over Collard Greens with Bacon
Serves one. 30 minutes
2 cloves garlic, minced
1/2 red onion, halved, then thinly sliced (julienned if you will)
5 big leaves collard greens. Separate leaves from stems. Leaves should be sliced in ribbons, stems diced. (It looks like a lot but it shrinks)
1 1/2 slices bacon, diced 1/3rd of an inch squares (I like thick cut canada bacon, and try to get the leanest one. We like fat, but not enough to kill you)
1 egg, as fresh as possible.

Enjoy!
Today's brunch is rich and full of color. Its sure to impress if you had a midnight guest and will be filling enough to last you through the afternoon.
The collard greens can be replaced with spinach or green beans or practically anything. But the richness of the egg yolk and bacon complement the slight bitterness in leafy greens. The bacon renders a lot of fat so you should not need any oil (unless you replaced it with turkey bacon or ham).
Serve with toast triangles, a mimosa, and follow with coffee and a piece of chocolate.
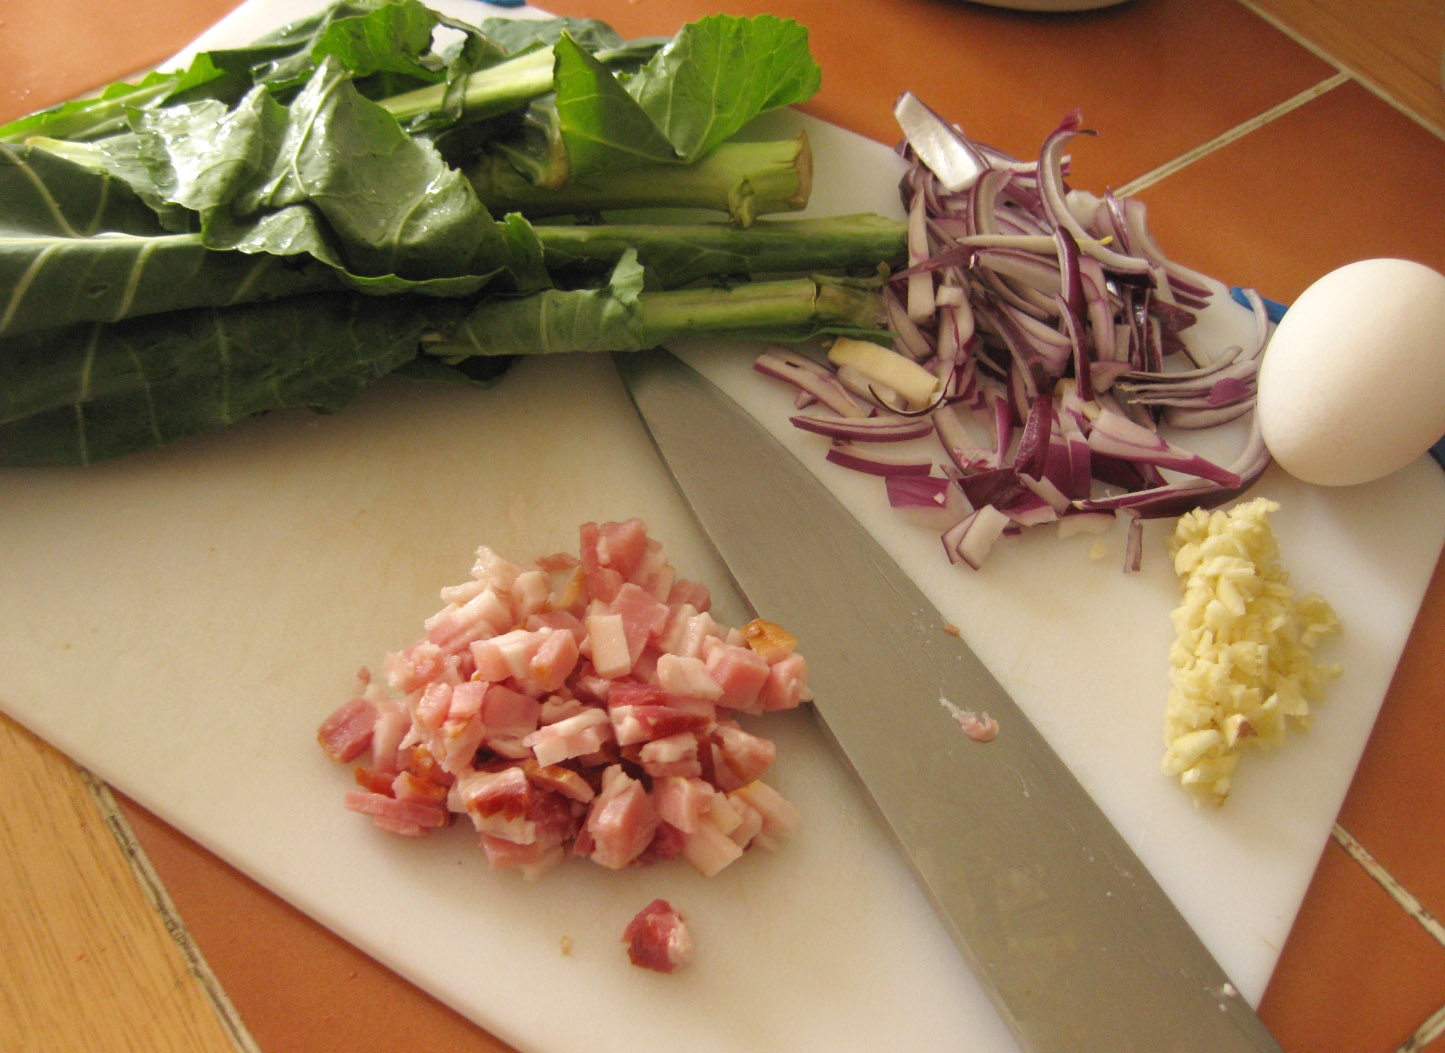
Poached Egg over Collard Greens with Bacon
Serves one. 30 minutes
2 cloves garlic, minced
1/2 red onion, halved, then thinly sliced (julienned if you will)
5 big leaves collard greens. Separate leaves from stems. Leaves should be sliced in ribbons, stems diced. (It looks like a lot but it shrinks)
1 1/2 slices bacon, diced 1/3rd of an inch squares (I like thick cut canada bacon, and try to get the leanest one. We like fat, but not enough to kill you)
1 egg, as fresh as possible.

- Heat a pot of water to boil. Put a drop of oil in a ladle and spread around. Put you egg on the counter so its room temperature.
- Meanwhile, heat up your skillet to high. Wait several minutes so you know its sizzling hot (a drop of water should hiss and evaporate)
- Drop in the bacon and let cook in a single layer. Cook for about 3-5 minutes, so they're cooked through but not crispy yet.
- Turn heat down to medium, add garlic, and onions. Stir to deglaze the pan, pulling all the flavor from the bacon on the bottom of the pan.
- Add collard green stems, cook for two minutes before adding leaves. Try to push the greens to the bottom of the pan and layering the bacon garlic onion compote on top. Add salt and pepper to taste and reduce to low heat while you poach your egg.
- Crack the egg into the pre-oiled ladle. Hold it in the boiling water for about 5 minutes. Don't submerge it until the egg white starts to turn solidify. You'll lose some white but just make sure to not puncture the yolk. Cook as desired - I like my yolk thick but a little runny.
- Plate the greens and bacon into a little mound on the plate, creating a hollow in the middle for the egg to sit. Drain all the water from the ladle before separating out the egg. Drop egg carefully in center of collard green nest.
Enjoy!
Tuesday, April 13, 2010
Leftovers --> Stuffed Peppers
Facts of life: Suanne hates leftovers. Suanne hates processed food (I'm looking at you condensed soup). Suanne also hates wasting food and taking obscene amounts of time to make a meal.
So what does she do when she has a cup of tofu casserole and half a cup of chinese sliced mushrooms? She reinvents dinner - and makes it look good to boot. These would look fantastic for entertaining and just replace the leftovers with other yummy things, like fresh mushrooms, sausage, quinoa, cilantro, salsa... You get the idea. If it goes will with peppers, you're golden.
Stuffed Peppers
3/4 cup stuffing + 1 pepper = 1 serving. Today's recipe came out with about 4 servings so I'm going to halve the recipe here since I bet you don't want leftovers either.
Total time = 30 minutes prep and 30 min in the oven.
1 cup of leftover stir fry. Will also work with pasta sauce, possibly mac n cheese, or rice casserole. Try it and find out! The less carbs, and the more veggies or meat, the better.
4oz of chicken, boneless, skinless, diced. (Leftover is fine here too)
1/2 onion, diced
2 cloves garlic, minced
1 tsp tomato paste
3/4 cup spinach, cooked and drained.
big pinch of oregano
tiny pinch cayenne and cumin
two red peppers - medium sized.
1 mozzarella stick
1 tbsp cream cheese
parmesan or bread crumbs for topping (optional)

So what does she do when she has a cup of tofu casserole and half a cup of chinese sliced mushrooms? She reinvents dinner - and makes it look good to boot. These would look fantastic for entertaining and just replace the leftovers with other yummy things, like fresh mushrooms, sausage, quinoa, cilantro, salsa... You get the idea. If it goes will with peppers, you're golden.
Stuffed Peppers
3/4 cup stuffing + 1 pepper = 1 serving. Today's recipe came out with about 4 servings so I'm going to halve the recipe here since I bet you don't want leftovers either.
Total time = 30 minutes prep and 30 min in the oven.
1 cup of leftover stir fry. Will also work with pasta sauce, possibly mac n cheese, or rice casserole. Try it and find out! The less carbs, and the more veggies or meat, the better.
4oz of chicken, boneless, skinless, diced. (Leftover is fine here too)
1/2 onion, diced
2 cloves garlic, minced
1 tsp tomato paste
3/4 cup spinach, cooked and drained.
big pinch of oregano
tiny pinch cayenne and cumin
two red peppers - medium sized.
1 mozzarella stick
1 tbsp cream cheese
parmesan or bread crumbs for topping (optional)

- Preheat the oven to 350 degrees with the baking rack in the middle of the oven.
- Heat up your saucepan on high with a tsp of olive oil. Saute the garlic, then the onions for a minute or two.
- Add the raw chicken (if applicable.)
- Add tomato paste. Toss in all your leftovers here and reheat them. Try not to add in extra water - you want a moist stuffing, but not soggy. When you've incorporated everything together, turn the heat off.
- Now take the mozzarella and shred it.
- Wash your peppers and take a look at them - you want to figure out how to cut them to get the most stuffable space. Most of the time people remove the stem and stuff through the top. I had a curvy pepper so I slit mine sideways. Slice a bit from the bottom so it stands up.
- Take a baking pan with walls that are a few inches high. I used a glass 9x9 cake pan. Wipe the bottom with a few drops of olive oil.
- By now the stuff in the pan should have cooled off. Stick it all in the food processor and give it a few pulses. Add the mozzarella and cream cheese. Just aim to get rid of the big chunks and make sure to scrap down the sides. If it doesn't look you have enough stuff to fill your two peppers, you can consider adding nuts, leftover rice, or more veggies!
- Stuff the peppers. The stuffing doesn't expand so feel free to make a big mound on top. If you like, press breadcrumbs and/or parmesan cheese on top of the stuffing mix. Stand the peppers up in the baking dish.
- Bake for 20 - 30 minutes, until the pepper is cooked through. Since the inside is cooked already, don't worry about undercooking it.
- Remove the peppers from the oven and let them stand for about 10 minutes. Then devour!
Thursday, April 1, 2010
Sesame Mustard Chicken
My oh so very awesome mother bought me some goodies this weekend: Sriracha hot sauce (my fave!) and sesame oil. Sriracha hot sauce is slightly sweet and is a warm hot. Its addictive, especially on dumplings. Sesame oil is great for marinades and soup - it imparts a very distinctive scent and flavor even with a tiny drop. Tonight's dinner incorporates both.

Sesame Mustard Chicken
single serving, super quick (25 min)
4 oz chicken diced (equivalent to one chicken thigh, no skin or bone)
1.5 tsp mustard (regular American French's is fine!)
2 squirts honey
2 squirts Sriracha (big pinch of cayenne/paprika is fine)
1/4 tsp sesame oil
2 tbsp soy sauce
3 tbsp cooking wine (again, I have leftover beer so that was used instead)
1 pinch ginger powder (or one minced ginger coin)
1 clove ginger, minced
(optional, 4-5 oz chopped spinach, kale, collard greens, broccoli to make it stir fry. Served over half a bowl of white rice.)

Sesame Mustard Chicken
single serving, super quick (25 min)
4 oz chicken diced (equivalent to one chicken thigh, no skin or bone)
1.5 tsp mustard (regular American French's is fine!)
2 squirts honey
2 squirts Sriracha (big pinch of cayenne/paprika is fine)
1/4 tsp sesame oil
2 tbsp soy sauce
3 tbsp cooking wine (again, I have leftover beer so that was used instead)
1 pinch ginger powder (or one minced ginger coin)
1 clove ginger, minced
(optional, 4-5 oz chopped spinach, kale, collard greens, broccoli to make it stir fry. Served over half a bowl of white rice.)
- I keep all my chicken pre-diced in the freezer in ziplocs. Toss all the ingredients into the ziploc bag with the chicken EXCEPT the garlic. If you forget, that's okay too.
- Defrost the chicken - that's right. After you toss stuff in when its frozen, the liquids will help it unfreeze. I also popped mine in a bowl and then the microwave (one minute on 50% power) to speed the process along.
- Come back in 10-15 minutes. The longer you let it marinate, the more flavorful it will be. A 10 minute time leaves a very light, sweet mustard taste, so if you're in a rush, no pressure. If you're making this stir fry, chop your veggies here. Or reheat your rice, do 50 crunches, or turn on the TV.
- Take the chicken and make sure its defrosted enough so that the pieces are separated from each other.
- Take your skillet, heat it up on high, and toss in a teaspoon of canola oil (or other. Peanut would be yummy but its not something I usually have). Swirl your pan and coat it evenly with oil.
- Toss in garlic, cook a minute until fragrant.
- Use chopstick or a fork to scoop and drain the chicken from the bag and into the pan. Leave the rest of the marinade in the bag - you'll be using it in a bit.
- Saute the chicken for about 3 minutes on each side. The marinade is watery compared to the oil in the pan, so the oil will pop. Don't freak, just wear long sleeves. As the chicken begins to stick, stir in a little of the marinade to deglaze the pan.
- Turn the heat down to medium. Add veggies if you're stir frying.
- Make sure your chicken is cooked through and serve!
Monday, March 29, 2010
Collard Greens and Mushrooms
My friend Jon is my city-foodie-friend. We meet up for meals and talk about the merits or Meyer lemons and shiso leaves. Recently he was working in my hometown and picked up kale from my local supermarket. "What's it like?" I asked. "Its a green leafy vegetable, sometimes sweet, sometimes a little bitter" he replied. So when kale was on sale at my local supermarket, I decided to give it a try. ...Except I bought the wrong thing! I picked up collard greens! I really like them actually - its not as sweet as spinach, but not as bitter as some Chinese leafy greens I've had. It strikes a good balance, and at 79 cents a pound, is hard to go wrong. (Kale's not bad either, but I think I like collard greens more!)

Collard Greens and Mushrooms - for one
4 big leaves of collard greens
5 mushrooms (I used baby bella)
1 clove garlic, minced
1 tsp butter
pinch of salt

Kale and Mushrooms with white rice and leftover barbecue chicken.
Collard Greens and Mushrooms - for one
4 big leaves of collard greens
5 mushrooms (I used baby bella)
1 clove garlic, minced
1 tsp butter
pinch of salt
- Chop the greens. The stems should be diced, the leave cut crosswise into strips. Separate the stems from the leaves as the stems will need to cook a little longer. Mushrooms should be cubed into bite sized pieces.
- Place your saute pan on medium high heat. Let it warm up a little.
- Drop in the butter and swirl the pan to let the pan get an even coating. Reduce heat to medium (butter has a low smoking point, so you don't want to cook it too fast or too hot)
- Drop in the garlic and saute until fragrant.
- Add stems. Let them saute for about 3 minutes, until bright green.
- Add leaves and mushrooms. Saute until leaves are bright green and shiny and mushrooms are darkened.
- Add pinch of salt - you really don't need a lot. And remember you can always add more, but never take away - its better to add a little at a time.
Saturday, March 27, 2010
Sweet Potatoes with Fresh Ginger
A little while ago, I was exhausted after a very long day at work. I desperately wanted comfort food, but I really didn't have much energy. So, after surveying my fridge, I discovered a huge sweet potato that I'd bought a few days earlier. Eureka!
I had visions of Thanksgiving - the ultimate comfort food holiday. Incidentally, I missed last Thanksgiving entirely because I had Swine Flu - ugh! I decided to reclaim at least part of my lost holiday and make this awesome, entirely satisfying dish.
Sweet Potatoes with Fresh Ginger
1 large sweet potato, peeled and chopped into 1-inch cubes
1 tbs. freshly grated ginger
2 tbs. butter
1/4 cup ginger tea (or water, but ginger tea gives it a really good flavor)
2 tbs. brown sugar
2 tbs. sour cream (optional, but makes the dish a little creamier. And no, you don’t taste it!)
A few pinches of salt
1. Toss sweet potato, ginger, butter, tea, and brown sugar in a two-quart, microwave-safe bowl. Cover with plastic wrap.
2. Place bowl in microwave for 8 - 10 minutes, stopping to stir the mixture every two minutes or so.
3. Once all of the sweet potatoes are softened, mash the bowl ingredients together.
4. Blend in sour cream (either with a fork, a potato masher, or an electric mixer - it depends on whether you want them to be lumpy or smooth). Taste.
5. Add salt to taste. **Remember: A little bit goes a long way! The goal is not to make salty sweet potatoes, but rather to bring out the subtlety of the other flavors.**
Makes about four to six servings, depending on how you portion it. Store leftovers in the fridge for up to a week, or in the freezer for four to six weeks.
I had visions of Thanksgiving - the ultimate comfort food holiday. Incidentally, I missed last Thanksgiving entirely because I had Swine Flu - ugh! I decided to reclaim at least part of my lost holiday and make this awesome, entirely satisfying dish.
Sweet Potatoes with Fresh Ginger
1 large sweet potato, peeled and chopped into 1-inch cubes
1 tbs. freshly grated ginger
2 tbs. butter
1/4 cup ginger tea (or water, but ginger tea gives it a really good flavor)
2 tbs. brown sugar
2 tbs. sour cream (optional, but makes the dish a little creamier. And no, you don’t taste it!)
A few pinches of salt
1. Toss sweet potato, ginger, butter, tea, and brown sugar in a two-quart, microwave-safe bowl. Cover with plastic wrap.
2. Place bowl in microwave for 8 - 10 minutes, stopping to stir the mixture every two minutes or so.
3. Once all of the sweet potatoes are softened, mash the bowl ingredients together.
4. Blend in sour cream (either with a fork, a potato masher, or an electric mixer - it depends on whether you want them to be lumpy or smooth). Taste.
5. Add salt to taste. **Remember: A little bit goes a long way! The goal is not to make salty sweet potatoes, but rather to bring out the subtlety of the other flavors.**
Makes about four to six servings, depending on how you portion it. Store leftovers in the fridge for up to a week, or in the freezer for four to six weeks.
AH-mazing Tuna Salad
While I normally pride myself on having a well-stocked kitchen, today was one of those rare days when I was scraping the bottom of the barrel. So, as dinnertime crept ever closer, and my tummy started grumbling, my mind struggled to come up with a way to combine the odd items in my pantry and fridge into some semblance of a real meal. "Protein," I thought, "I want protein." But, alas, having not purchased groceries in almost two weeks, both my fridge and freezer were devoid of meat. As I rummaged through my pantry, looking for something - anything - that appealed to me, I found it: tuna!
"Tuna?" you say, "Really?" Oh. Yeah. Within seconds, I had a game plan and my final results were simple and delicioso! Read on for my recipe!
AH-mazing Tuna Salad
2 - 5 oz. cans tuna, drained
1.5 tbs. mayo
1.5 tbs. horseradish sauce (which I ALWAYS keep on hand)
1 tsp. lemon juice
2 tbs. red onion, minced
1/4 tsp. dill
salt
fresh ground pepper
1. Place tuna in a non-reactive bowl.
2. Add mayo, horseradish sauce, and lemon juice. Mix until well-blended.
3. Mix in onion.
4. Add dill. Taste. (It's always good to taste as you go; otherwise, you're cooking blind!)
5. Add salt and pepper to taste.
Serve as is, over salad greens, or on toast. Store leftovers in the fridge for two to three days.
Helpful hints:
- Use a non-reactive (like glass or plastic) bowl. When you mix high-acidity foods (such as lemon or tomato) with metal, your dish can take on a metallic taste - bleh!
- Normally, I'm not a fan of lemon (neither is Suanne, for that matter); however, it does have some helpful uses. I add a touch of lemon just about anytime I use frozen or canned seafood. It seems to restore some freshness to the meat. And if you only use a small amount, it's usual undetectable.
"Tuna?" you say, "Really?" Oh. Yeah. Within seconds, I had a game plan and my final results were simple and delicioso! Read on for my recipe!
AH-mazing Tuna Salad
2 - 5 oz. cans tuna, drained
1.5 tbs. mayo
1.5 tbs. horseradish sauce (which I ALWAYS keep on hand)
1 tsp. lemon juice
2 tbs. red onion, minced
1/4 tsp. dill
salt
fresh ground pepper
1. Place tuna in a non-reactive bowl.
2. Add mayo, horseradish sauce, and lemon juice. Mix until well-blended.
3. Mix in onion.
4. Add dill. Taste. (It's always good to taste as you go; otherwise, you're cooking blind!)
5. Add salt and pepper to taste.
Serve as is, over salad greens, or on toast. Store leftovers in the fridge for two to three days.
Helpful hints:
- Use a non-reactive (like glass or plastic) bowl. When you mix high-acidity foods (such as lemon or tomato) with metal, your dish can take on a metallic taste - bleh!
- Normally, I'm not a fan of lemon (neither is Suanne, for that matter); however, it does have some helpful uses. I add a touch of lemon just about anytime I use frozen or canned seafood. It seems to restore some freshness to the meat. And if you only use a small amount, it's usual undetectable.
Subscribe to:
Posts (Atom)
